Showing posts with label quilt. Show all posts

Thursday, March 11, 2021

Quilting challenges

Hand-quilting with Ryan

Sometimes, hand-quilting just plain poses challenges.

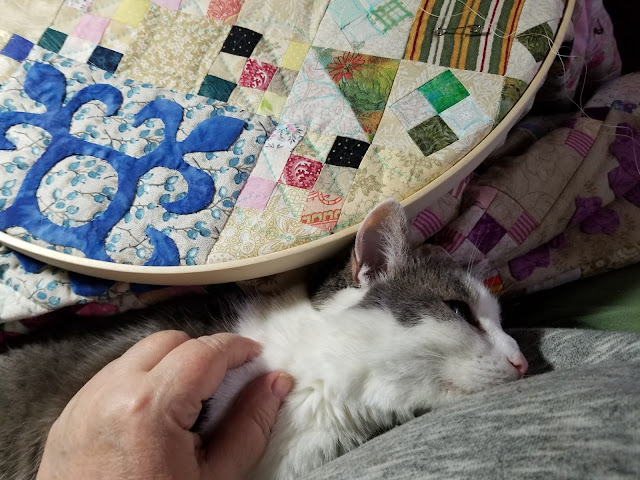
While it may appear that my problem is the snuggly kitty on my lap, that is only half of the story. 

Besides the fact that Ryan insists on commandeering my full attention, something that happens often around here, but my real problem is trying to get used to using a hoop on a stand. I had been quilting on my lap. This quilt, "#Afternoon Delight" is large and a tad unwieldy. I thought a quilt frame might tame it a little.

Hand-quilting is not something I have done for some time. The last time I attempted it was on my most recent project, a lavender Dresden Plate quilt. 

As stated in a previous post, My latest favorite quilt is done, I attempted to outline all the blades of the plates, but all the seams coming together made that nearly impossible. At the very least, it wasn't enjoyable. Quilting is not supposed to be like work. So, I finally gave up after looking at that unfinished project for too many months. I took out all the stitches and starting anew, free-motion quilting it on my sewing machine. The quilt is now done and I'm very glad I made that decision.

With this project, I decided to hand-quilt it for a variety of reasons. Much of it was hand-appliqued, as explained in a previous post: Applique--now this is fun. Also I wanted to do less showy quilting because the complexity of the pattern with all its colors deserved to be showcased rather than the quilting. But the biggest reason to hand-quilt this one, was to challenge myself to complete it. 

The jury is still out for me on using this new quilting frame. At the very least, it is good to be able to keep the quilt in the frame rather than a bunched up mess piled on the couch when I'm not working on it. There is definitely a learning curve to get used to quilting this way. I think I'm getting the hang of it. I enjoy getting into the zone. It will take me a little longer to finish this though, because I often have to take time out for kitty cuddles. But that is fine with me. 

Friday, October 12, 2018

Happiness is a pop of color


CHMusings: kitchenThe older I get the more I realize how much I like color: especially bright colors, but also softly muted ones, pastels, and all their variations.

I love colors. When I think back, as a kid, I was always enamored with a brand new box of crayons or my favorite, now vintage, Venus Paradise colored pencils. I wonder what ever happened to those. Today, I’m keenly aware that colors really do seem to make me happy. Perhaps they always did.

When I decided to give my drab kitchen a face lift, I thought about all the colors now available.

The first place I looked for inspiration was at the huge variety of colorful Kitchen Aid mixers. I don’t happen to have one, but their color range now is simply amazing. Not only did I look at appliance colors, but I also Googled kitchen remodels and looked on Pinterest. One particular color caught my eye; turquoise. The first time I saw a turquoise kitchen was on the TV Show “Mistresses,” an ABC production a few years ago, starring Alyssa Milano. It was canceled in 2016 after a run of several years. The trendy turquoise kitchen belonged to the show’s character April, played by Rochelle Aytes. It was so striking that I had remembered it. So when I was thinking of colors for my own kitchen that was in the back of my mind.


CHMusings: teapot
I decided to add a few turquoise things to accessorize my dull kitchen. It only took a few things to make me realize, I really do love this color. There are lots of different variations to it, which ranges from a little more blue to a little more green. I like them all, no matter the shade. When I look at the color on my new teapot, for example, it is almost like a visionary mouth-watering sensation.

For many years, our Ozarks home was pretty much colorless in my view. In fact, every room in our house was beige. A couple of the rooms had beige patterned wallpaper, but most of the walls had no color; they were that standard slap-a-coat-of-paint-on-the-drywall color. I suppose it was off-white, but might as well have been beige. Floors were carpeted in beige. Even the appliances were “biscuit,” another word for beige.

My penchant for color has been mentioned in previous blog posts, such as this one where I detailed the remodeling of our sun porch. It was the first introduction to turquoise into our house. There are now turquoise touches throughout. We painted over the pale pink that had been on the walls on the porch. Now, the color scheme is turquoise and hot pink. It is rather whimsical with a pink flamingo theme.


CHMusings: sunshine bedroom
I also painted the bedroom a bright, sunshiny yellow. It is like waking up inside a smiley face. What a great way to start the day. This room made me realize I no longer have one favorite color. I love them all. The accent color is turquoise, designed around one of my favorite quilt projects that highlighted the dual color scheme.
CHMusings: yellow/turquoise quilt


Color matters because I  quilt

I credit my love of color today to my being a quilter. I think the selection and use of different fabric has sharpened my appreciation of colors and how they work together. My favorite quilts remain monochromatic, but I’m also enjoying the experimentation of mixing colors together. This appreciation reminds me of the way my camera’s view finder honed my visual perspective. I find color, particularly bright colors, to be uplifting.

I can’t think about the colors of my home without giving some thought to my quilting projects. For me the, “which came first,” question, relates to decorating the room or making the quilt. I suppose that just like the chicken and the egg, the two go hand-in-hand. Each room is decorated with color and at least one quilt.

CHMusings: turquoise table runner
So since quilts don’t seem to work in the kitchen, I settled for a table runner. I recently completed the one pictured here, which brightens up the room and adds a splash of color where it is needed most.

This project had a dual purpose. It is the first project I have made in a very long time. It marks a return to my beloved hobby.

For more information on making this quilt, check my my quilting blog, for details on this project.


Monday, June 19, 2017

Not just a plain old pot rack anymore

To some it may be just an old wooden pot rack, but to me, it is a precious piece with a story to tell. It is a part of the family now, and is well traveled, having been in three states.

It all began several years ago when my sister-in-law Jean joined me in selling at our garage sale, which has now become an annual event. With the miles between us since my husband and I moved to Arkansas, our sales are also a family reunion of sorts. It wasn’t like that in the beginning, when we all lived in Illinois.

One of the items she was selling was a wooden pot rack. I always admired it in her kitchen. I immediately professed my love for it and said I had to have it.

Despite this stroke of luck, the fact is, I never got to use it. My daughter, Jenny, decided it would look great in her apartment. I was ready to fight her for it, but my husband piped in and said she could have it. I’ve been pouting about it for the last 15 years.

Finally, Jenny, who moved it with her to Massachusetts, decided she didn’t want it any more. She was moving into a new house in Rhode Island and didn’t want to bring it with her. She figured she would sell it at a garage sale until I told her I still wanted it. So, she mailed it to me. I will be paying the postage, but it will be so worth the $21 to finally have my pot rack. Finally, I’ll be enjoying it in my own kitchen for the first time. I couldn’t wait to install it.

I actually have a small rack that I hang cast iron skillets and a couple copper pots from. It is very utilitarian, but I love it because it is a relic from an old railroad depot in the town where we used to live. I had hoped to hang both racks, one above the other.

I took everything down from the wall, giving me a chance to clean behind, under, and around everything that was there. I positioned my new, (actually 25 year old) pot rack and drilled the holes. It was a really tight fit and I had to place it all the way to the edge of the wall. What I didn’t know was that the corner of that wall was reinforced with metal. The screws just stopped dead in their tracks when they hit it. Upon further inspection, if I hung it there, my cabinet wouldn’t open fully. I realized it wasn’t going to work. And, I had no other wall big enough in my kitchen. I was crushed.

I was having a garage sale of my own in a few days. I entertained the idea of selling my precious pot rack, but then thought better of it.

Then it hit me. I don’t have to hang pots from it; I can drape a quilt onto the rung that would normally hold the pot hooks. So that is what I did. I turned my precious pot rack into an even more precious quilt rack.

I have just painted my bedroom, something I’ve wanted to do since we moved into this house 12 years ago, but never quite found the time or energy to do it.

So, now it is done. And the first thing I hung on the newly painted wall was my quilt rack. On it I’ve displayed my favorite quilt. It hangs above the cube shelves where I store my fabric stash. This is also a new endeavor. I used to keep all my quilting material in tubs under the bed, but now, it is all organized. One portion of my room resembles a quilt studio. I couldn’t be happier.

Tuesday, March 18, 2014

Making progress; quilting feathers

Quilted feathersI've finally mastered free-form free-motion quilting feathers. The word "mastered" may be a bit of an exaggeration, but is pretty descriptive of how I feel about it. 

Suffice it to say I accomplished feathers, at least on this block. I didn't think that would ever happen. To experienced quilters, feathers seem so simple. Yet to those of us that haven't been able to master them, they represent a really difficult skill. 

Joyously, I crossed that line yesterday. There is something so wonderful about the moment when a struggle becomes an accomplishment. It is truly an 'aha' moment. Suffice it to say I am exhilarated. 

To me, feathers on a quilt are elegant. They give it a regal feel. A beautiful quilt needs beautiful feathers.

This marks the latest revelation I've had in what has become an ongoing saga of my going-on-two-years-now quilt project, better known as my aqua and yellow quilt...I must come up with a new name for this; I'm tiring of calling it that. 

When I finally began to free-motion quilt the blocks in this sampler, it was a long time coming. I am really going to love it when it is finished, because it has represented such a remarkable journey. I'm so grateful to Leah Day for her incredible inspiration and the can-do attitude she has communicated to me and thousands of other aspiring quilters. I've been immersed in her videos and that of other quilters who have shared their expertise with the rest of us. There are some amazing online resources available to anyone with an interest. 

I finally got the confidence to design the quilting for these quilt-as-you-go blocks, again, giving credit to Leah Day for the amazing filler designs she has devised. This is the third of 18 blocks in this quilt. The other two are below. I think I can see the light at the end of the tunnel for this quilt.

When I looked at the stack of completed blocks, cut to size and awaiting their final action--the quilting--I wasn't sure how to proceed. Since I had taken pictures of each of them, I printed out the first one, as a sketch, rather than as a photograph. Google's Picasa, excellent and free software to manage digital pictures, has the ability to turn any photo into a line drawing. 

Just looking at the block, I saw what I wanted to do. They say, let the quilt talk to you--and it did. This is the rough sketch I came up with.
This is how it turned out. I made only one change, the stippling in the corner. I thought it looked better with the more uniform lines. 

I know my quilting is not perfect. In fact, it is far from that, but I also know that once this quilt is done and it is washed, the effect will be like magic. There is nothing better than a just washed quilt. The area that isn't quilted puffs a little which accentuates the stitches even more. Imperfections simply melt into the background. Oh boy, I can't wait.

Anyone who has followed my journey--and I appreciate your interest-- knows that this quilt began in Jan. 2013 as a BOM (Block of the Month) from the Quiltingboard, a wonderful and active quilting site I belong to. This particular BOM was meant to be somewhat of a challenge. It was and continues to be. 

When all the blocks were completed in December 2013, I decided to place them on-point, on the diagonal rather than the vertical, I had to come up with some filler blocks. I agonized for a time about how to quilt those, since there are six of them that are all the same. So, I started with the printout of the line drawing. This is what I came up with for all of them. It is basically all about hearts with some stippling in the open areas. I wanted to showcase the diagonals, since that forms the secondary pattern in the quilt, so I think this will do the trick.

The following articles in CHMusings relate to this quilt
Enhanced by Zemanta

Tuesday, March 11, 2014

New way to mark the quilt

Glad quilting
I have never been a fan of marking the quilt. It is the one aspect of quiltmaking that I find often tedious and sometimes frustrating.

I've tried different marking pens, pencils, pounces, chalks, and everything else I can think of. 

I'm always looking for new ways to do this task. So, when I learned of this new technique, marking with Glad Press 'n Seal, I thought I would give it a try.

Glad quilting 2I apologize for not being able to give credit to whoever came up with this rather ingenious idea. Truth is though, I can't remember where I heard about it. I have been doing a great deal of reading on the Internet about marking a quilt.  

Building Blocks Quilt Along

Glad quilting 3In doing Leah Day's Building Blocks Quilt Along, one that combines piecing and free-motion quilting techniques, block by block, I decided this was a perfect time to try marking the quilting pattern using Glad Press'n Seal.

In the first photo, at left, I placed a piece of the Glad Press'n Seal onto a pre-printed pattern provided in Leah Day's Building Blocks Quilting Project. The paper has a sticky side that adheres perfectly to the pattern. Once smoothed out across the paper, it was easy to trace the lines of the quilting design onto the Glad wrap with a ball point pen.

Glad quilting 4The pattern requires stitching in the ditch and around the block. I decided to do that first, since although the Glad paper is transparent, stitching in the ditch is hard enough without any obscurity. Besides, I tried it and the lines were awful so I picked out the stitches, ripped off the paper and started again. I put pins into the paper, which probably wasn't necessary, but after lining it up perfectly with the seams, I didn't want it to shift at all.

It was pretty easy to sew through the paper, although I admit it did feel like I was sewing a disposable baby diaper.

Glad quilting 5The third picture shows the entire block completely quilted. It was easy to follow the lines, or at least as easy as following the lines without the paper would be. That is never an easy task. Truthfully, I much prefer free-motion quilting freehand. I need practice at this however, because I know that isn't always possible.

Removal of the paper was fairly easy, as shown in the fourth photo. It was just a matter of scratching the paper with a sturdy fingernail or the trusty seam ripper, and then ripping it off.

The only problem here was that with this pattern, there are lots of tiny quilted areas, so it was a little more tedious than it otherwise might be. Also, the paper remained sticky. It was easily tearable though and it appears that every bit of it was removed.

The fifth and final picture shows the completed block. There appears to be no remnants of paper left, and the stitches were not harmed in any way by pulling on the paper.

Even though I can't see any remnants of the paper, I will not press this block on its right side. I will press it from the back just to be sure. I've seen what plastic products do to an iron. It isn't pretty; doesn't smell very well either.

I just might use this technique again, although I am not sure it will be my only marking technique. It is nice to have options. Certain things will work better than others depending on the circumstances.

I am just glad I found a way to try something new.


Enhanced by Zemanta

Thursday, February 20, 2014

Ready to quilt


My last update on this project was nearly a month ago, my first blog post of the new year. I had just given up on trying to figure out how to complete this quilt top, daunted by mathematics, colors, and patterns, and style. So, I left it alone for a while. I started working on another project altogether--a new quilt project Leah Day's Free-Motion Quilting Building Blocks Quilt Along. This one will be black and white and pink all over--more on that another time.

It is about time for an update on my complex quilting journey to complete one particular project. I couldn't be more excited. This soap-opera will one day reveal a completed yellow and aqua quilt.


Once I finally quilt obsessing over just how to construct the finishing triangles needed for this on-point quilt, I figured out how to make them. It was so easy. I gave in to the computer software as my friend Jane had suggested. At the time, I had thought of all kinds of reasons why that wouldn't work, but, I was completely over-thinking the problem. Once I realized that, I printed out the templates, added the seam allowance of 1/4-inch and cut out the pieces. I sewed them together, and voila, the perfect setting triangles, as seen below.

There was no figuring. I didn't even need to wrack my brain with some obscure mathematical formula. I made 10 of them along with four smaller triangles for the corners.

I am now ready to come up with a final layout of my squares. I just love the addition of the chain blocks, also Jane's idea, which adds the secondary pattern. I'm thrilled that the triangles continue that pattern to the edges of the quilt. That was what I wanted all along.

Next, I will cut out the backing fabric and squares of batting. I will then begin free-motion quilting the individual squares. The designs for each squares are something I haven't planned for. This will be my final design choice and final challenge with this quilt. I have never been very good at picking quilting designs, but I am in no hurry. I want to examine each block until just the right design comes to me.

I will use yellow and white gingham with alternating white squares for the backing. I already have the batting. While the quilt is large enough to cover the bed, I may just add a couple of borders to finish it off. I can't wait to post a picture of the completed quilt. So, stay tuned!

Enhanced by Zemanta

Saturday, January 25, 2014

Merrily we quilt along

I can't believe this will be my first blog post of the new year. Heck, it doesn't even feel new anymore--it has been so long.

In fact, since I was here last, I celebrated my 62nd birthday, gotten through Christmas and New Year's, enjoyed a 37th wedding anniversary with my dear husband, marveled at the nine years we have now lived in Arkansas, solved the quilting dilemma that plagued me, as mentioned in my previous blog post, and started a new quilting project. Whew!

I digress. Going back to that last blog post, where I cried out for help in my quest to figure out how to finish all those quilt blocks of a yellow and aqua quilt, I must thank my friend Jane, a master quilter that I knew from high school. She steered me to the final decisions I've ultimately made on just how to finish this project.

It was not without a little pain getting there, however.

quilt blocksThis project was a block of the month (BOM) project from quiltingboard.com, a gathering of talented folks who have bonded over their love of quilting. I started making blocks in January 2013 and completed the last one in December. I wasn't so sure what I wanted to do with these 12 12-inch square blocks.

Heck, my first problem was how to lay out the blocks on the computer to audition a design. Thanks to Jane's guidance, I used my EQ5 (Electric Quilt) program to lay out the blocks. They weren't the exact blocks or the exact same fabrics, but they were at least close enough to come up with an idea.

She offered a suggestion of setting the blocks on point, that is as diamonds, rather than squares. Twelve blocks does not translate into a bed-sized quilt, no matter how you look at it, but this was an interesting option. She actually emailed me a picture of what it might look like, with the addition of a few more blocks. I fell in love with the picture she created. So, I decided to do another six blocks to fit between these in the on-point design.

Once completed, I laid the design onto my bed just to get a look at how it might go together. I liked what I saw.

The only thing I need to do now is make the triangular-shaped blocks for the edges, the corner triangles that will complete the rectangle. More on that later.

I also needed to decide if I want to hand quilt it or machine quilt it. The difference would mean sewing the blocks together first, if it was to be hand-quilted or sewing them after they are quilted if I planned to free-motion quilt them first.

I decided to machine quilt this, since many of the blocks have lots of points. That means lots of seams. Seams are difficult to hand quilt through. Plus, I really wanted to work on my free-motion quilting skills. I like the idea of finishing a block with the top, back, and batting first and then putting them together. That alleviates trying to manipulate three layers--the quilt top, batting and backing fabric without wrinkles--something that is very taxing in the small space I have to work in. It also alleviates all that pinning/basting. I am so much better with small, manageable, detailed work anyway. Plus, I like how my last 'quilt-as-you-go' project turned out--periwinkle blue quilt

Since I decided I wanted to machine quilt this, the first thing I did was add strips of fabric around each block. Fortunately, I had just barely enough of the fabric I wanted to use for this. Whew, it was close. I even had to sew a few scraps together to make the final pieces, but it worked.

quilt layout
I liked how the secondary pattern showed up, the diagonal lines in the new chain blocks I had made to add to those already done. The 1 1/2" strips added to the overall size of the quilt too. I liked that. Now, to figure out how to do those triangles.

Oh boy! That was a problem that plagued me for days and days. I laid out a design, where the chain pattern in the mostly yellow blocks (the alternating blocks that I added) would continue. I wanted an aqua color to set off those setting triangles, but with the pattern to continue. I tried and tried to figure out how to do it, but just couldn't.

There is a formula, that calculates the size of the triangle, which is easy enough to figure out, but to use that size and get the pattern to continue--well I must have a mental block because I could not get it right. It would seem that making a square and lopping it in half along the diagonal would work, but that doesn't take seam allowance into consideration.

I couldn't let my EQ program tell me how to do it because I drew the initial pattern in for show, without accurate measurements. I'd have to design it all over again to do it right. Every step I tried to take met with a new problem.

Finally, I decided I am going to make plain yellow triangles in varied fabrics and be done with it. The pattern will not continue, but I've decided that it just isn't worth losing my mind over this. Quilting is supposed to be fun, and it is. I refuse to let geometry stand in the way of my enjoyment of the quilting process. So, even if the chain pattern doesn't continue, I'm OK with that. I think it will still be a beautiful quilt when it is done.

Making this simple decision was very freeing. Perhaps another day I can take up the geometric challenges of triangles.

I've also decided to replace that heart block, the one my cat, Ryan, is resting on. It doesn't seem to fit. Honestly, Ryan thinks I quilt just for her. She is the world's greatest critic, always enthusiastic about my work.

I decided to replace that heart block with a double star. This is my favorite block, one that I've put into so many projects already. I've decided this will be my signature block from now on.

So onward and upward in my merrily-we-quilt-along life.
Wednesday, December 11, 2013

My quilting quandry, what to do?

I'm in a little bit of a quandary. I've finished piecing the last block in my block of the month quilt from Quiltingboard.com. Now, I have all these beautiful blocks and no plan as to what to do with them. 
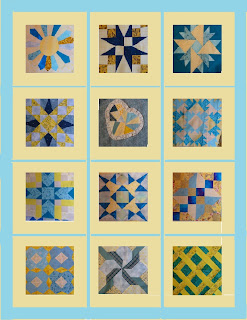
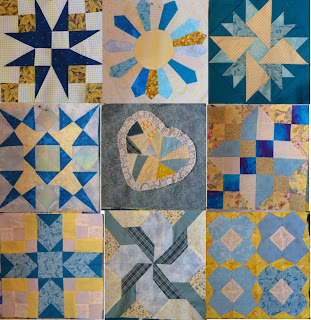
12-block composite Aqua-yellow quilt

It is time to make a decision as to just how to proceed. This is generally the most tedious part of the quilting process for me--the decision making. There are so many options. Each one has challenges. 

I have never shied away from making decisions and I have always loved a good challenge. I never want my quilting to become burdensome in any way, so I generally take this approach slowly and thoughtfully. 

I have to say, I enjoy every part of the quilting process though much of it is about making decisions. 

When all is said and done, I am generally confidant with my ultimate choice. I consider decision-making like walking along a path in the forest and coming to a split in two or more directions. Deciding which one to take is important so as to preclude later regrets. Regrets are against my religion.

I don't know if I am typical in the way I make decisions or not; I just do it the best way I know how. That includes looking at all the options, weighing the potential hazards, and finally coming up with the best approach. 


Allow me to think out loud here.

Periwinkle Blue quilt
Rendering Aqua-yellow quiltI really loved how Periwinkle Blue turned out. That is my most recent completed quilt. So I'm leaning toward doing this one the same way--quilt as you go (QAYG) with free-motion quilting each individual block. 

Thing is, I don't have a pattern to follow, as I did with Periwinkle. That was a Craftsy class taught by Leah Day, probably the best free-motion quilter that ever was or ever will be. I really am in awe of this woman and her work.

The challenge with this option is that I'm a newbie at free-motion quilting. I am also not very comfortable with choosing designs that would enhance and highlight the pieced blocks. Then again, I haven't tried. Picking the fabric to outline the blocks and provide the joining strips would be pretty easy. I'd use the same concept as with Periwinkle, a light yellow sashing and dark aqua joining strips. I'm thinking yellow gingham. (Love gingham)! I happen to have some of that in my stash. I think it would be stunning. It might look something like the photo on the right. Now, if I can only remember how I did that...

A variation of this might be to insert a 9-patch or some other simple patterned block between these complex blocks. That would enlarge the quilt, which is desirable. I could dress up the rather plain blocks with a nice hand-quilted motif. 

Another option I've considered a more random, scrappy-looking quilt by making a few more smaller blocks to add here and there. I really like that look. In fact, one of the commentors in the quiltingboard included her quilt-in-progress photo which did just that. I have never done this technique before, but am totally intrigued by it. It looks so much less formal. It would take making a few more small simple blocks, say four-patches, nine-patches, churn-dashes, etc. to add to a row or column. It would do away with the symmetry, which I rather like. I could either hand-quilt or machine quilt with the QAYG method. Right now, I love both, so I don't really have a preference. Perhaps a combination of both would be good. I'm thinking perhaps hand-quilting a lovely border. I love the feel of hand-quilted quilts, but I love the speed of completion and challenge of machine quilting. With this project, there are lots of seams with all these complex star points, so hand-quilting might be a real pain.

My real stumbling block in making this decision has had to do with illustrating what is in my head. Creating the quilt pictures were a bigger challenge for me than making the quilt blocks. It has been really frustrating to try to figure out how to arrange these blocks on the computer. It seems like an easy thing, but it took me 2 days of messing with it, just to get this image. I don't have a computer program that allows me to easily manipulate 12 pictures. 

I tried to use Electric Quilt 5 (EQ5), but I'll be darned if I can figure out just how to do this simple task. I would really like to have EQ7, which would make simple tasks so much easier, from what I hear, but I'll be darned if I am going to pay full price for it. Electric Quilt does not offer updates to their old program. They require purchasing a brand new version. I simply can't afford that. 

I've tried using various photo imaging programs, but the best so far is simple Windows paint. At least they allow select and move within a larger image. That has its limitations too though. I used to have a program that was perfect for this job--Corel Photo Paint, which would easily stitch 12 images together, but my program isn't compatible with Windows 7. It simply no longer works. I have never been able to find one that is comparable, at least that I could afford. 

This challenge is one that I will simply have to solve. I've been trying to use Gimp, an excellent and free photo editing software, but it is complicated. I'm sure it would do the trick if I just knew how. I simply haven't learned it yet. That will take some time, and I really just want to quilt. 

Perhaps my best option is the old tried-and-true method of colored pencils and graph paper. I'll keep you posted on my decision, if and when I ever make it. 

A post script -- I just loaded all 12 individual files representing my quilt blocks into MS Word. Duh, why didn't I think of this before? 

Tuesday, September 17, 2013

Latest quilt pushes my color comfort zone

Not only is my quilting obsession satisfied by a project I've been working on since January, which takes me out of my color comfort zone, but my "order thing" is getting a workout too.

At the beginning of the year, I laid out some ideas for projects I'd like to complete in 2013. It dawns on me that my record is about 1 and 5. As I mused last January about a very ambitious quilting goal, I've fallen far short. I don't feel too badly about that though. I have always preferred spontaneity to being tied to a specific plan, so whatever I chose to do to fill my time was probably the right decision at the time. Since I haven't been bored in more than 50 years, I'm sure I enjoyed whatever it was. And isn't that what it is all about?

I did finish one project, Periwinkle Blue, in March. I am working on the second project, one that may be completed by the end of the year--the Quiltingboard.com Block of the Month, (BOM) project.

Not only have I kept up with it, but I've really enjoyed it. I get really excited when a new month rolls around. I like having this one scheduled activity since I try not to live with any rigorous routine. I rarely construct the new block on the first day of each month, but I nearly always check to see what it looks like and generally print out the pattern as soon as possible.

yellow and aqua quilt colors
All of my quilt blocks will originate from this box
This project was important to me because I decided to use it to play with colors for the first time. Most of the quilts I have completed so far have been monochromatic. I just like a variety of values from the same color family.

With this latest quilt though, I decided to use two colors--yellow and aqua.

quilt design wallWhen I started, I picked out all the yellow and aqua fabrics that looked like they might go together. They were fabrics I had already collected in my stash. I have since bought a half yard here and a fat quarter there to add to it, but it is pretty much limited to the original box of fabric pieces I selected. The pieces vary in size. Some are leftover from other projects.

In continuity with my "order thing," the name I've given to a subtle but random need for organization in my life, I decided to install a makeshift design wall in my very limited sewing space. I placed a small three-fold paper cutting board covered with quilt batting against a wall next to my sewing machine. It only holds two 12.5-inch squares across and three squares down, but it is enough to give me an idea about what I'm working on. It isn't ideal, but it is definitely adequate.

I can also use my computer to view the finished blocks, and even to arrange them. This may be the best method for me.

I'm anxious to see what the final three blocks will look like. Until I see the finished pieces, I will have no idea how to finish this quilt, but there is certainly time to think about that.

These are the nine blocks I've completed so far, and they are in no particular arrangement.

While I wasn't certain about the color combination at first, the more I work with them, the more I am beginning to like the two colors together.

The blocks chosen for this project were supposed to be a challenge. Indeed, they have been. But that makes it all the more fun. I've decided that I really love matching seams and points, but triangles seem to give me fits. More than one of these seams has been ripped out and redone.

I think, at first glance, that some kind of sashing between the blocks would be in order, as well as perhaps some kind of border that can tie the colors together. Right now I have no idea what kind or what color, pattern or solid.

I still have to decide on the backing fabric as well as the type of quilting--hand or machine. Lots to think about yet, so I'm glad there is still time to decide.

If anybody has any ideas or suggestions, I'd love to hear them.

Enhanced by Zemanta

Wednesday, June 5, 2013

Quilting, gardening, and flying geese

Lately, there have been a few forks in the road of my quilting quest. The latest took me down a dirt path--quite literally. I've been doing some gardening, thanks to the beautiful weather we have been having this Spring. Things are looking alive and healthy. It is all I could do to not get out there and play. Last year, with its hot, dry conditions, I couldn't imagine anything ever coming back to life, but it did. So after tugging at the tangles of Bermuda grass in the flower beds, there were honestly times I wondered if I will ever quilt again. That stuff is so hard to pull with its long underground root system that rivals anything I've ever seen.

I did manage though, to get some quilting in, even though not as much as I'd like. I know I will never be far from a threaded needle. It really doesn't matter much, whether that needle is attached to my sewing machine or stuffed into a pin cushion, the little thing calls to me. 

I have a few projects in various stages, but the main one is my quilting board Block of the Month (BOM) project. I'm not sure if I'm pleased with the colors I've chosen--turquoise and yellow, but I'm sure when it is a completed quilt, it will be beautiful. After all, quilts are just naturally beautiful! 

The only other projects I have been working on lately are to make a few table runners as birthday gifts. I've made three so far, in different colors, using the same favorite pattern. 

I just made this green one for a friend of mine.  

Flying geese table runner

The pattern is from my purple quilt, the BOM sample quilt from last year's Craftsy class. In fact, that's it peeking out from behind the table runner.

The quilted design is from the free-motion quilting pattern taught by Leah Day for her Craftsy class, Free Motion Quilting a Sampler. I'm getting pretty good at these stitches, but only because I've done them on 10 blocks now--three for the three table runners I've made and the original block in the quilt. 

This is the only table runner of the three that I managed to snap a picture. 

It is a simple block, made of several pairs of flying geese arranged with simple squares.

Flying Geese - done!
Flying Geese - done! (Photo credit: jeansophie)
For non-quilters, a piece of patchwork known as 'flying geese' refers to the pattern shown at left with four flying geese patches. There are many different ways to make this patch. I use the one where in this example, a blue square is sewn diagonally onto two corners of a cream-colored rectangle. The excess fabric--half of the blue square, a triangle, and its accompanying cream colored triangle beneath, are then trimmed away. The pattern is vintage and represents as it suggests the pattern made by geese flying north in the summer and south in the winter. 

It has been said that runaway slaves fleeing northward used handmade patchwork quilts to communicate, with one another. They used to hang flying geese quilts on the line to signal to others that it was time to follow the geese northward. Their movements were masked by the noisy geese. The direction of the points on the quilt showed them the way.

I've achieved 'flying geese' progress in that I no longer have to draw a diagonal sewing line onto my squares. I have learned to eyeball it. Now that's progress! 

Time to go water the garden.


Enhanced by Zemanta

Wednesday, March 6, 2013

Quilting is a process


"Periwinkle Blue," named for a song by Doris Day and my favorite crayon color, is finally done; well almost. It still needs the final binding on the edges. Then I will be able to throw it into the washer and dryer and see if it comes out looking like a quilt, all scrunchy, warm, and inviting, with its stitches still intact.

What a joy it has been to make this quilt.

I will never tire of the process of turning a pile fabric into a completed quilt. This was more than a year in the making, and I loved every minute of it.

Not only has this been enjoyable, but I learned so much. 

I started making quilts about 15 years ago, on a whim. I have been on a steep learning curve ever since. From those early days of writing about quilt shows for the local newspaper, to watching Alex Anderson on 'Simply Quilts' every day, to the present, I have been somewhat surprised at how much there is to learn about this art form. 

To me, making a quilt is so much more than simply creating a cover for the bed. In actuality, the utilitarian aspect of a quilt is far less important to me than the process of actually creating it. That doesn't mean I don't like to snuggle up with it once it is done. I treasure that part. But even more so, I am drawn to the creative process. Each of the now nine quilts I have made has been a learning experience.

For me, quilting is also a therapeutic activity. It is that quiet time that we all cherish. Admittedly, I have no problem leaving dirty dishes in the sink if I feel like quilting. 

Making Periwinkle Blue

This quilt started out as a block of the month project through a free on-line class on Craftsy, taught by Amy Gibson, in January 2012. A new block, actually two, were chosen by Amy for each month, unbeknown to class participants. 
I cannot express how much fun I had doing this class. I looked forward to the first of the month every single month, always anxious to see what the next blocks would look like. Amy Gibson is a sweet, gentle woman who reminds me of a kindergarten teacher--my kindergarten teacher. Taking her class conjured up memories of Miss Carr, back about 55 years ago. I don't remember what Miss Carr looked like, but now, in my mind she looks like Amy. Amy is also an accomplished and prolific quilter.

Early on I decided this quilt would be in shades of purple, what has long been a real favorite of mine. I am really fond of monochromatic quilts. That is my comfort zone. While creating the blocks, exactly as directed, I started thinking about different ways they could be changed, altered, or what they might look like with an entire quilt made from them. I do have some favorites as well as some I wasn't crazy about. I didn't let my taste dictate anything. I just went with it. 

When this project was completed, I had stacks of blocks that I wasn't really sure what to do with until I heard about another Craftsy class, taught by Leah Day--Free motion quilting a sampler. I debated about paying for this class. Money is really too tight for such things. When it was offered at a special discounted price, I signed up. I'm so glad I did. Leah's class was specifically related to showing how to free-motion quilt the sampler quilt I had just completed. My question of just what I wanted to do with all these purple blocks was answered.

I was already familiar with Leah's work, which is the most exquisite I've ever seen. In my view, watching her was almost akin to Michelangelo taking his brush to the ceiling of the Sistine Chapel. This woman is an amazing artist. She makes it look so effortless. I assure you--it is not! But, it was fun! I made my little ole sewing machine do things I never even knew it could. 

The thing about quilting is, I love every part of the process. And there are so many parts. Each one requires some skill. From the fabric choices to the precision cutting, exact 1/4" seams, to the assembling, to the actual quilting, this is a fun and worthwhile activity, every step of the way. I never knew piecing a quilt top was so involved. I never knew that quilting was so involved either. I will always love hand quilting, but I admit really being intrigued by free-motion quilting. I will do it again, particularly on small projects. I can also see projects with a combination of both hand and machine quilting in the future.

It was very easy to maneuver the quilt block in the sewing machine. There is a lot of twisting and turning with free-motion quilting. I'm not certain if I am ready or even able to tackle quilting an entire quilt in that little tiny space of my machine. Just maneuvering the quilt to add the binding strips was a chore. I can only imagine what trying to maneuver a whole quilt would be like. 

This particular project was also new to me, in that it was done as a 'quilt-as-you-go' project. That method requires that all the blocks are quilted first and then assembled by sewing together with binding strips. Traditional quilts are constructed just the opposite--with the quilt top layered with batting and backing fabric and then quilted.

I almost forgot--the very best part is the result after the quilt is washed and dried. I just did this and could barely believe my eyes. I was worried about the imperfections in my sewing. It doesn't matter, because the texture created by the stitches is extraordinary. I absolutely love how this quilt turned out.

I highly recommend quilting as a pleasant and useful activity. Whether you are like me and love the process, it is so rewarding to finish a quilt.

Enhanced by Zemanta

Monday, January 28, 2013

Periwinkle blue; a quilt in the making

Believe it or not, this is an entire quilt. I will call it Periwinkle blue after my favorite crayon color and song by Doris Day on an album my father used to enjoy.

I started this project a year ago and thanks to two Craftsy classes, I'm hoping it turns into more than just a pile of purple.

The first, a block-of-the-month class was taught by Amy Gibson. The quilting will all be done on my little inexpensive Jenome sewing machine, using a skill I haven't yet perfected. I have high hopes however, due to the Craftsy Class on free motion quilting  exquisitely taught, by Leah Day. I just completed it.

I know I've said it before, but it bears repeating that Leah Day is an amazing quilter. She is to machine quilting what Jinny Beyer or Alex Anderson are to hand quilting. All three are absolute heroines as far as I'm concerned. While I'm name-dropping, I cannot say enough about Amy Gibson either. She has to be the sweetest human being on the planet, and she quilts. Beautiful quilting is only one of her many attributes.

This project will be my very first use of the 'quilt as you go' technique, whereby the blocks will each be quilted individually before being sewn together rather than the traditional method of stitching the blocks together  and then quilting the entire piece. This quilt will be a reversible, purple quilt, which I'm planning to fall in love with. Purple with all its values and shades was my favorite color, even before pink.

This above stack contains 20 squares of batting, (the bottom white layer), 20 different background squares, which are all different values and patterns of purple, followed by lavender border strips, which I will sew onto the original blocks. Finally, there are 20 different sampler blocks representing a year in the making. The purple fabric will be the binding, though I haven't cut it yet. That's it! I'm anxious to get started. I plan to practice the pattern for each block before I begin. I haven't decided yet if I am going to buy a shade of purple thread or use the silver/white thread I already have. I am leaning toward the latter. Wish me luck!

Enhanced by Zemanta

Tuesday, January 15, 2013

This year will be filled with quilting projects

It is only a few weeks into the new year and I already have an abundance of quilting projects in mind:
  • As previously posted, I am really looking forward to following Leah Day's instruction to free-motion quilting last year's block of the month (BOM) sampler quilt. I am still in the decision-making phase of this project, but am anxious to get started on it.
  • I have a hand-quilting project to work on--a small BOM calender quilt--where each of the 12 blocks in it represents a different month of the year. This was a project through the Quilting Board. I have been enjoying interacting with other quilters there and have met lots of new people. Every day I go to the board to read other quilters' questions as well as to enjoy pictures of projects these talented men and women have created. 
    I am already making some progress on this quilt. I recently sewed the calendar blocks together with black sashing to make a completed quilt top. I think I'd like to add another border or two though, just to increase the finishing size of the quilt. That decision is yet to be made though, not to mention deciding on the backing fabric. The border question isn't as easy as it sounds, because all of the blocks are different colors. The blocks are pretty busy too, so I'm completely torn about what color the borders should be.
  • Speaking of decisions, I have decided to take on two more BOMs. One is this year's quilting board BOM. I so enjoyed the last one that I wanted to do another. I believe the theme is something like Oh yes you can. Who can resist such a positive-sounding project? 
  • I've also signed up for the Skill Builder BOM at Pile O'Fabric with Alyssa Lichner. This project was billed as inspired by Leah Day's FMQ and using her quilt-as-you-go technique, so it had my attention early on. It will begin in a few days--with the lesson beginning on the third Thursday of the month.
    The first challenge here was to pick out the fabric for both the quilt front and the quilt back, since they will be done at the same time. Alyssa talks greatly about color choices. That intrigued me because my favorite quilts have been monochromatic using the same color family with different values and patterns. I admire other people's quilts that are more colorful, but I have never gone there myself. So, with this project, I am jumping out of my comfort zone right into the color wheel. I have chosen some fabrics from my stash that should suffice. They are basically the colors from a floral fabric that I like. They are pinks and blues, greens, and yellows. I sure hope this works!
    Speaking of color, I am enjoying the Special Effects with Color series with Christine Barnes on The Quilt Show. I've also started another free Craftsy BOM. That is a class by Laura Nownes and results in a non-traditional quilt made of irregular sized and shaped blocks. It looks like lots of fun.
  • Last but not least, last year I began working on a lavender Dresden Plate quilt. I love doing the hand work, sewing all those plates onto the background fabric. The 12" blocks are an alternating cream with pure white paisley. The purple dresdens are scrappy. It will be a fun quilt to work on, but there is certainly no rush to finish it. I suspect it will take a back seat to some of these other projects, but that's OK. It will be nice to always have a fall-back project, in case I ever get bored.  

Monday, January 14, 2013

Determined to learn free motion quilting

A few months ago, I set out to learn free motion quilting. I am making some headway, thanks to the excellent advice and technique taught by Leah Day, who is probably the best machine quilter I've ever seen.

Her work looks like something done on a long arm quilting machine, but it isn't; it is done on her domestic sewing machine. She really puts her machine through its paces. She claims anyone else can do it too.

I started reading Leah's blog the Free Motion Quilting Project. What Leah has done is truly amazing. Not only is she an accomplished artist, but she is young, pretty, sweet, patient, and a natural teacher who is willing to share her expertise with anyone who is interested. Above all, she is an inspiration.

I took her up on one of her quilt along projects, just to see if it was possible for me to even learn FMQing. The project was a small, whole cloth quilt. She provided the design.

I had only dabbled in FMQing a tiny bit, as seen in a previous blog post Trying new quilting challenges. I was intrigued enough that my insatiable appetite for learning kicked in. I knew I wanted to know more and practice more of the skills that until recently I didn't even know existed. Here is the result:


While there are tons of mistakes and a few total screw-ups, the overall result wasn't half-bad. In fact, I rather like how this piece turned out. It was certainly good enough to make me want to get better. I could see how practice would improve the look and feel of my work.

When I saw that Leah was teaching a class at Craftsy, I was interested. As much as I wanted to take this class, I couldn't afford it. Times are tough and I have been cutting back even on my beloved quilting magazine subscriptions. But when the class went on sale, I signed up.

The class, called Free Motion Quilting a Sampler, is to quilt the Craftsy Block of the Month, which was taught by another of my favorite quilters--Amy Gibson. Amy's class was free. It offered some new piecing techniques that provided a new modern take on traditional blocks. Some of the techniques were not yet in my limited quilting repertoire. I really enjoyed the BOM, looking forward to the first of the month every month for a year.

Leah's class, used that BOM quilt to teach FMQ designs, like a follow along project.

I finished watching the last lesson yesterday. I didn't quilt along, at least not yet. I will watch the lessons again when I'm ready to dive in. I wanted to take the entire class before making any decisions on how to quilt these blocks. After all, the 20 blocks that will make up this quilt span an entire year of work. I had already decided to FMQ this quilt rather than to hand quilt it. I love hand-quilting, but I already know how to do that. I need to know how to quilt on my machine, so that decision was an easy one. Besides, I have other projects that can accompany my mindless television watching at night.

The biggest decision was whether to quilt the entire quilt or to use the quilt-as-you-go technique. I chose the latter, simply because I really am limited by space, as described in a previous post, Happy New Year Happy Quilting. Besides, I had no idea how to quilt the blocks and then put them together to make a finished quilt. I have wanted to learn that technique for some time. Now is as good a time as any. I was initially concerned that this would require wasting fabric, but I now know there is no such thing. Even the tiniest pieces can be reused in another way. For one thing applique projects are great for this.

I am not sure when I will actually put one of my blocks beneath the needle, but I have been doing a little practicing. I had some old flower sack dish towels that had seen better days. In fact I just replaced them with new ones, so I sewed some batting in-between two of them and have been doing a little practicing.

Leah taught many different designs in her class. Some are easier than others. I won't be happy until I can make pretty free-hand feathers. While I'm still in the process of making the decision about which fabrics to use for sashing and backing, since the quilt will be reversible, I know it won't be long now. I have already purchased the batting, which simply needs to be cut into squares. I'm pretty anxious to get started, and will post my progress.

Enhanced by Zemanta

Tuesday, January 8, 2013

Happy New Year; happy quilting!

It is only Jan. 8th.

My apologies. for starting my first blog of the new year a full eight days into it.

The truth is I've been busy following my primal instincts to organize. My body clock is somewhat confused. It can't discern whether it wants to warm the nest for a long winter or start cleaning for the coming of spring. Darned climate change has me so confused. I'm working entirely too hard on this nest! Being the consummate optimist though, I see this as a positive. I love being organized, although most people who know me think my chaotic surroundings are simply messy. To me though, my messes are methodical.

Anyway, I've been trying to get my quilting life in order. Order is the key word in our tiny retirement mansion that consists of only two bedrooms. We previously lived in a huge two-story house. There I had a sewing room on the second floor. The problem is, I had just begun sewing. When we left there I was working on only my second quilt. Now that I am really into quilting; I need lots more room and I just plain don't have it. No problem though. A little organization can do wonders. It is something I have been working on over the last couple months as I continue to collect a fabric stash and get more involved in quilting projects.

My quilting areas can be broken down into three main areas. The first is the most important.

It is where I can get creative--where I sew. I just converted what was supposed to be a breakfast nook just off the kitchen into a mini sewing room. It is a perfect out-of-the way place, with natural sunlight streaming through the window and in close proximity to the ever-hungry felines in our house.


The 'bar' is divided into three sections.

The first is a cutting area. This is where I keep all my rulers.

TIP: I keep my rulers handy and accessible by using two plate holders--you know those little plastic hinged pieces that fold up when not in use. They are expandable, so they are perfect for the many different sizes and types of rulers needed. I have one ruler that is about 24" long--way too long for one holder--but not too long for two of them side-by-side.

There isn't much that can be said about the middle space. It is my sewing area and contains my sewing machine. I have a Jenome that I bought at Sears many years ago. It was probably the cheapest machine they made, but it is a little work horse. I keep it on a cutting mat for last minute trimming.

It is very convenient to keep my pressing area close to where I sew. My husband made a little ironing board out of plywood on feet that I covered with fabric and batting. It is perfect for pressing those perfect 1/4" seams.

The other parts of my sewing life would not be complete without storage areas. I keep all my fabric in shallow bins that store under my bed. I sort it all by color. I generally buy 1/2-to 1-yard pieces of many different fabrics rather than large yardage of a few. I love the variety. I love the colors and feel of the fabric. I love just having it; looking at it. I'm the same way about yarn, although that has taken a backseat to quilting of late. I have been crocheting and knitting since I was a youngster, but quilting is still fairly new to me. I have so much to learn.

I also have a bedroom closet converted into a sewing storage space. This is where fabric goes before it gets sorted. I consider sorting fabric into bins rather like filing paperwork. I don't do that often either. I just happened to have taken these pictures after sorting. Otherwise there are stacks and stacks of fabric in there.

This closet has lots of goodies in it--knitting needles, crochet hooks, sewing and embroidery thread, rolls of eyelet lace, ribbon, quilting magazines, batting for the next several quilts, and all kinds of stuff. Those tubs are filled with fabric scraps. The cedar chest on the bottom left, contains my husband's grandmother's tatting shuttle, which I've yet to learn how to use. One of these days, if and when time permits.


Enhanced by Zemanta