Saturday, January 25, 2014

Merrily we quilt along

I can't believe this will be my first blog post of the new year. Heck, it doesn't even feel new anymore--it has been so long.

In fact, since I was here last, I celebrated my 62nd birthday, gotten through Christmas and New Year's, enjoyed a 37th wedding anniversary with my dear husband, marveled at the nine years we have now lived in Arkansas, solved the quilting dilemma that plagued me, as mentioned in my previous blog post, and started a new quilting project. Whew!

I digress. Going back to that last blog post, where I cried out for help in my quest to figure out how to finish all those quilt blocks of a yellow and aqua quilt, I must thank my friend Jane, a master quilter that I knew from high school. She steered me to the final decisions I've ultimately made on just how to finish this project.

It was not without a little pain getting there, however.

quilt blocksThis project was a block of the month (BOM) project from quiltingboard.com, a gathering of talented folks who have bonded over their love of quilting. I started making blocks in January 2013 and completed the last one in December. I wasn't so sure what I wanted to do with these 12 12-inch square blocks.

Heck, my first problem was how to lay out the blocks on the computer to audition a design. Thanks to Jane's guidance, I used my EQ5 (Electric Quilt) program to lay out the blocks. They weren't the exact blocks or the exact same fabrics, but they were at least close enough to come up with an idea.

She offered a suggestion of setting the blocks on point, that is as diamonds, rather than squares. Twelve blocks does not translate into a bed-sized quilt, no matter how you look at it, but this was an interesting option. She actually emailed me a picture of what it might look like, with the addition of a few more blocks. I fell in love with the picture she created. So, I decided to do another six blocks to fit between these in the on-point design.

Once completed, I laid the design onto my bed just to get a look at how it might go together. I liked what I saw.

The only thing I need to do now is make the triangular-shaped blocks for the edges, the corner triangles that will complete the rectangle. More on that later.

I also needed to decide if I want to hand quilt it or machine quilt it. The difference would mean sewing the blocks together first, if it was to be hand-quilted or sewing them after they are quilted if I planned to free-motion quilt them first.

I decided to machine quilt this, since many of the blocks have lots of points. That means lots of seams. Seams are difficult to hand quilt through. Plus, I really wanted to work on my free-motion quilting skills. I like the idea of finishing a block with the top, back, and batting first and then putting them together. That alleviates trying to manipulate three layers--the quilt top, batting and backing fabric without wrinkles--something that is very taxing in the small space I have to work in. It also alleviates all that pinning/basting. I am so much better with small, manageable, detailed work anyway. Plus, I like how my last 'quilt-as-you-go' project turned out--periwinkle blue quilt

Since I decided I wanted to machine quilt this, the first thing I did was add strips of fabric around each block. Fortunately, I had just barely enough of the fabric I wanted to use for this. Whew, it was close. I even had to sew a few scraps together to make the final pieces, but it worked.

quilt layout
I liked how the secondary pattern showed up, the diagonal lines in the new chain blocks I had made to add to those already done. The 1 1/2" strips added to the overall size of the quilt too. I liked that. Now, to figure out how to do those triangles.

Oh boy! That was a problem that plagued me for days and days. I laid out a design, where the chain pattern in the mostly yellow blocks (the alternating blocks that I added) would continue. I wanted an aqua color to set off those setting triangles, but with the pattern to continue. I tried and tried to figure out how to do it, but just couldn't.

There is a formula, that calculates the size of the triangle, which is easy enough to figure out, but to use that size and get the pattern to continue--well I must have a mental block because I could not get it right. It would seem that making a square and lopping it in half along the diagonal would work, but that doesn't take seam allowance into consideration.

I couldn't let my EQ program tell me how to do it because I drew the initial pattern in for show, without accurate measurements. I'd have to design it all over again to do it right. Every step I tried to take met with a new problem.

Finally, I decided I am going to make plain yellow triangles in varied fabrics and be done with it. The pattern will not continue, but I've decided that it just isn't worth losing my mind over this. Quilting is supposed to be fun, and it is. I refuse to let geometry stand in the way of my enjoyment of the quilting process. So, even if the chain pattern doesn't continue, I'm OK with that. I think it will still be a beautiful quilt when it is done.

Making this simple decision was very freeing. Perhaps another day I can take up the geometric challenges of triangles.

I've also decided to replace that heart block, the one my cat, Ryan, is resting on. It doesn't seem to fit. Honestly, Ryan thinks I quilt just for her. She is the world's greatest critic, always enthusiastic about my work.

I decided to replace that heart block with a double star. This is my favorite block, one that I've put into so many projects already. I've decided this will be my signature block from now on.

So onward and upward in my merrily-we-quilt-along life.

Wednesday, December 11, 2013

My quilting quandry, what to do?

I'm in a little bit of a quandary. I've finished piecing the last block in my block of the month quilt from Quiltingboard.com. Now, I have all these beautiful blocks and no plan as to what to do with them. 
12-block composite Aqua-yellow quilt

It is time to make a decision as to just how to proceed. This is generally the most tedious part of the quilting process for me--the decision making. There are so many options. Each one has challenges. 

I have never shied away from making decisions and I have always loved a good challenge. I never want my quilting to become burdensome in any way, so I generally take this approach slowly and thoughtfully. 

I have to say, I enjoy every part of the quilting process though much of it is about making decisions. 

When all is said and done, I am generally confidant with my ultimate choice. I consider decision-making like walking along a path in the forest and coming to a split in two or more directions. Deciding which one to take is important so as to preclude later regrets. Regrets are against my religion.

I don't know if I am typical in the way I make decisions or not; I just do it the best way I know how. That includes looking at all the options, weighing the potential hazards, and finally coming up with the best approach. 


Allow me to think out loud here.

Periwinkle Blue quilt
Rendering Aqua-yellow quiltI really loved how Periwinkle Blue turned out. That is my most recent completed quilt. So I'm leaning toward doing this one the same way--quilt as you go (QAYG) with free-motion quilting each individual block. 

Thing is, I don't have a pattern to follow, as I did with Periwinkle. That was a Craftsy class taught by Leah Day, probably the best free-motion quilter that ever was or ever will be. I really am in awe of this woman and her work.

The challenge with this option is that I'm a newbie at free-motion quilting. I am also not very comfortable with choosing designs that would enhance and highlight the pieced blocks. Then again, I haven't tried. Picking the fabric to outline the blocks and provide the joining strips would be pretty easy. I'd use the same concept as with Periwinkle, a light yellow sashing and dark aqua joining strips. I'm thinking yellow gingham. (Love gingham)! I happen to have some of that in my stash. I think it would be stunning. It might look something like the photo on the right. Now, if I can only remember how I did that...

A variation of this might be to insert a 9-patch or some other simple patterned block between these complex blocks. That would enlarge the quilt, which is desirable. I could dress up the rather plain blocks with a nice hand-quilted motif. 

Another option I've considered a more random, scrappy-looking quilt by making a few more smaller blocks to add here and there. I really like that look. In fact, one of the commentors in the quiltingboard included her quilt-in-progress photo which did just that. I have never done this technique before, but am totally intrigued by it. It looks so much less formal. It would take making a few more small simple blocks, say four-patches, nine-patches, churn-dashes, etc. to add to a row or column. It would do away with the symmetry, which I rather like. I could either hand-quilt or machine quilt with the QAYG method. Right now, I love both, so I don't really have a preference. Perhaps a combination of both would be good. I'm thinking perhaps hand-quilting a lovely border. I love the feel of hand-quilted quilts, but I love the speed of completion and challenge of machine quilting. With this project, there are lots of seams with all these complex star points, so hand-quilting might be a real pain.

My real stumbling block in making this decision has had to do with illustrating what is in my head. Creating the quilt pictures were a bigger challenge for me than making the quilt blocks. It has been really frustrating to try to figure out how to arrange these blocks on the computer. It seems like an easy thing, but it took me 2 days of messing with it, just to get this image. I don't have a computer program that allows me to easily manipulate 12 pictures. 

I tried to use Electric Quilt 5 (EQ5), but I'll be darned if I can figure out just how to do this simple task. I would really like to have EQ7, which would make simple tasks so much easier, from what I hear, but I'll be darned if I am going to pay full price for it. Electric Quilt does not offer updates to their old program. They require purchasing a brand new version. I simply can't afford that. 

I've tried using various photo imaging programs, but the best so far is simple Windows paint. At least they allow select and move within a larger image. That has its limitations too though. I used to have a program that was perfect for this job--Corel Photo Paint, which would easily stitch 12 images together, but my program isn't compatible with Windows 7. It simply no longer works. I have never been able to find one that is comparable, at least that I could afford. 

This challenge is one that I will simply have to solve. I've been trying to use Gimp, an excellent and free photo editing software, but it is complicated. I'm sure it would do the trick if I just knew how. I simply haven't learned it yet. That will take some time, and I really just want to quilt. 

Perhaps my best option is the old tried-and-true method of colored pencils and graph paper. I'll keep you posted on my decision, if and when I ever make it. 

A post script -- I just loaded all 12 individual files representing my quilt blocks into MS Word. Duh, why didn't I think of this before? 

Friday, December 6, 2013

The Ozarks is a winter wonderland! Who knew?

I was born in Chicago during a blizzard. 
Perhaps that explains why I can't help but love this weather.
rural winter
Winter in the Ozarks

American Goldfinch
The American Goldfinch is probably my favorite bird. While his winter feathers are muted compared to the bright yellow he wears in the summer, this splash of color is a a welcome scene in the winter landscape.
American Goldfinch in winter
Still wearing some of his yellow feathers from summer, this American Goldfinch posed in appreciation of the sunflower seeds that are always readily available at our house.
Tufted Titmouse
This Tufted Titmouse awaits his turn at the birdfeeder. Since the snow started falling, it is a very busy place.
Ozarks snow scene
This is not quite as inviting as it was during the summer months, but with the first day of Spring only 104 days away, I can wait as I enjoy this beautiful winter season in the Ozarks.
Ozarks birdhouse
This looks more like a scene from the North Pole than the Arkansas Ozarks as the ice-encrusted magnolia buds await Spring


Enhanced by Zemanta

Thursday, December 5, 2013

Winter weather is upon us

Winter weather can be scary. I'm hoping that isn't the case today and tomorrow with Winter Storm Cleon...

chicken wire encased in iceAs I write at my desk next to a window, an icy rain is falling. It is noisier than the usual precipitation as frozen pellets bounce along the ground and bombard the remaining red oak leaves still attached to branches and twigs. There is a kerplunk every time ice chunks hit the metal surface of the heat pump just below my window. The poor thing is working hard to crank out enough heat to warm the house even as it gets pelted from the frozen rain falling from a near colorless sky. Work harder I say, since it is never quite warm enough in the winter for my liking.

This atmospheric onslaught is the first of what promises to be a long couple of days, according to the experts who meticulously study their computer models. I fear they may be right, as the coating of ice is covering most of the ground now and drops of liquid has frozen in place, defying gravity as it hangs from every surface. Parts of the trees are now frozen in place, stiffly moving as a unit when a breeze blows, rather than as individual leaves, branches, and twigs. The wind seems to be picking up a little too. That isn't good.

This is the kind of weather we in the Ozarks have been dreading.

Arkansas ice storm in '09
Arkansas' 2009 ice storm was pretty devastating to trees and shrubs
No one wants a repeat of the dreaded ice storm a few years ago that left so many of us without power for days. My husband and I didn't have electricity for five days. The ice storm was one of the worst things I'd ever seen. The damage was widespread. We still have some damaged trees on our property. I hope it doesn't get this bad!

The latest word from the weather watchers is that the temperature is continuing its downward spiral. The result will be that the icing turns to snow. We could get a significant amount of it too.

Snow is OK with me, just as long as it doesn't become excessive. All things in moderation...

 I hope I can provide a weather update tomorrow or the next day. That would require electricity, which I hope we still have. For all the people in the way of Winter Storm Cleon, stay safe and warm.
Enhanced by Zemanta

Tuesday, December 3, 2013

♫ Lemon tree very pretty and the lemon flower is sweet...♫

Lemon tree
I can't believe this little lemon tree is trying to bear fruit. 

My husband gave me this Meyer Lemon tree for Mother's Day. He knows how much I absolutely love plants, so it was a very thoughtful and considerate gift.

I never dreamed it would live, let alone thrive. It got flowers this summer, but they all fell off, except for one. 

Lemon tree with a lemonNow I know what all those bees were doing. Thanks bees.

Out of all those flowers, one has grown into a little, tiny, baby lemon. See it at left. 

I never dreamed I could grow lemons indoors, but I brought the plant inside weeks ago and the plant is still going strong. In fact, it is blooming again. 

There is a sweet fragrance to the flowers, just like the song says. 

I'm simply in awe of this little plant. Perhaps my black thumb is turning green again after all. I have had some successes of late. I sure hope that continues because I find such joy in growing things. Perhaps I was a farmer in another life. Or, perhaps I'm becoming a farmer in this one.

Enhanced by Zemanta

Tuesday, November 19, 2013

Retail stores are said to rush the season

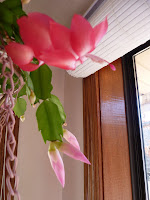
Christmas cactus blooms
Christmas cactusThey have nothing on my Christmas Cactus.

I suppose rushing the season is just how it is these days. At least that is the message I'm getting from one of my Christmas Cacti.

I have several of them actually, but this plant has been blooming for more than a week already. Even if it is a Thanksgiving Cactus, it is still early.

No matter. I love their delicate pink flowers whenever they open.

I bought this plant after Christmas two years ago at Home Depot because it had a pretty pale pink flower. Note the buds in the photo above. Last year I was surprised to learn the pot I bought really contained two different plants, as evidenced by the flowers that have already opened. They are a much deeper color. It was such a pleasant surprise.

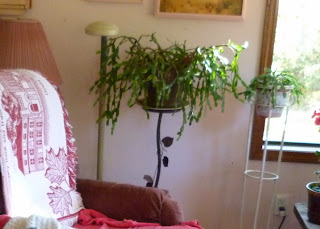
Christmas CactusI actually have several Christmas Cactus plants that always bloom at Christmas. The large one, shown at right, is the mother plant. The one in the pot next to it was started from a cutting. This is just one of several that I've grown from cuttings.

I obtained this plant from a garage sale in Bull Shoals many years ago. She said it had been in her family for generations. This reminds me a Christmas Cactus my Aunt Hazel had for many years that had belonged to her mother.

Perhaps these should be renamed legacy plants.

These plants are so easy to grow. They don't require anything special. Because they are succulents, they will live with sparse watering. In fact, they like to be on the dry side. They like indirect light, but are not too fussy about it. They have even withstood little cat paws that bat and flick at them as though the fronds were a toy.

Getting the plants to bloom

I've often heard that to stimulate blooming, these plants must be placed in a closet from for six to eight weeks before Christmas. I have never done that and my plants bloom like clockwork. The natural shortening of days in the winter are enough to encourage blooming. No closets are necessary in my experience.

For anyone new to indoor gardening, I think a Christmas Cactus, or even several, is a must have.


Enhanced by Zemanta

Monday, November 18, 2013

New toy for the girls

Cats have such a happy life, where everything is fun!

Since we just bought new furniture, we thought we would give it a fighting chance, protecting it from the plethora of cat claws we have in our house. So, we recently gave the girls a new scratching post. You would have thought they had never seen one before. Silly me--I thought a scratching post was rather utilitarian. In reality, it is just another cat toy. But then, isn't everything?
Kasey is so aloof
She is also the resident Fraidy Cat
The video at right, reveals the real personalities in three of our four cats. Kasey isn't in it, since she is nowhere to be found at the moment. Wait til she finds out her sister are going to be movie stars and she is left out. I can see the pouty look on her face already. Kasey is generally such a Fraidy Cat. The fourth born, she always follows behind her sisters, never taking that first step. She has apparently seen that no harm has come to them, because she certainly has gone after  that scratching post with a real fervor.
Ryan is the adventurous one. Though Ryan looks very much like Kasey--in fact we call them twins--she is very different. She is the first to try anything. As afraid as Kasey is, Ryan is just the opposite. She is fearless. We named her after Ryan Newman, my favorite NASCAR driver whose nickname is Flyin' Ryan, named for how he drives around a racetrack. That moniker fits his namesake. This cat climbs to the top of everything she sees--the bedroom door, the top of the window, the top of our seven-foot bookcase, etc. 
Then there is Junior, a.k.a. The Bug. She is the smallest, sweetest and most innocent-looking one of the bunch. She was born with a deformed right front paw, so she hobbles on three legs most of the time. She also has a tendency to be a loner, and is seemingly less healthy than her sisters. She is also the most affectionate. She likes to snuggle, with any of her sisters, with me, or with our dog, Shadow, a rescue dog who makes a slight appearance at the end of the video. Shadow and Junior are buddies, although he doesn't really get along with the others consistently. Junior's looks are deceiving. While she looks like a little angel, she can be an attack cat. It is difficult to imagine by looking at her, but she is the bully of the bunch. If she wants a space, for example and one of the others is there, she will chase them away and take it for herself. There are fights, but Junior usually wins them.
Then there is Kenni, the second born. Kenni is far different from the others. If Kenni was a human, she'd be a linebacker. Nuff said. Yet she is a gentle giant. She loves to play. Drag a string along and she will follow you anywhere. 
These cats were born on our front porch. Their mother Timi was a stray that adopted us. She comes in to eat with her kids every morning, as well as whenever she gets the urge. She is an outside cat that spends plenty of time inside. Timi gave birth to the girls on July 11, 2007. It was love at first site. I couldn't part with any of them, so husband John and I have allowed them in to fill our empty nest and our hearts. They bring us joy and laughter. 
This is my first YouTube Video.
Enhanced by Zemanta